Wednesday, June 29, 2011

Princess Shower Cake

I was so excited to make my first baby shower cake! My husband organized a shower for a coworker and I offered to make a cake. This shower was a little different because it was for the daddy-t0-be. But it so happens that he is expecting a baby girl, so there was no way this cake was going to be anything but girly!


Daddy-to-be chose strawberry for his cake flavor, so the pink cake just added to the girly-ness of it all!


Strawberry cake, vanilla buttercream, filled with buttercream & fresh strawberries, and marshmallow fondant decorations. He even opted to take the edible crown home to save (such a sweet daddy).


And if he's anything like my husband, that little baby already has daddy wrapped around her tiny finger!


Aren't all girls daddy's princesses after all?

Monday, June 27, 2011

4th of July {Inspirations}

The 4th of July is a week away and I want to share some fun ideas to help make your celebration fabulous!

First up are some beautiful and festive treats...

I love the whole "sweet in a jar" trend so this red, white & blue cake in a jar is something I really want to try! Check out Babble for the recipe & instructions.


If you are a big coconut fan like me, then these beautiful little coconut stars from Hungry Happenings are sure to be a hit!


How about some patriotic strawberries for your party? These look gorgeous!


This photo is via a member of allrecipes.com. There are no directions, but you can make these by dipping your strawberry in white chocolate (or white candy melts) and then dipping them in blue sugar (found in your grocery or craft store's cake supply aisle). Be sure to follow the directions on the chocolate or candy melts for dipping!


If you are looking for some ideas for party favors, here a few great ones...


I love this fun idea using red hots! Visit Nothing but Country for complete instructions & the free printable. 


This cute ring pop from Lisa Storms would be a huge hit with the kiddies (and maybe a few grown ups too)!


How about a fun firecracker favor like this one? Find the instructions and free printable on it is what it is.

These clever firework favors are made from a pringles can! Love it! Brought to you Amanda from Shindig Parties to Go. You can find the instructions & free printable on her guest post at Lil' Luna.


Get creative with these fun printable treat bags & cupcake toppers from The Crafting Chicks.


There are so many beautiful, fun & {FREE} printables for the taking to help make your celebration....SPARKLE. Check these out...


I love this striped collection that includes a pennant banner, sparkler holders, toppers & more. Visit Print Your Party to download.


If you are planning a BBQ for the 4th, then this collection featured on Catch My Party would be perfect! Be sure to check out the other free printables available!
Of course it's not a party without the pig ;) A super fun stars & stripes collection from Piggy Bank Parties!


And finally...if you are looking for a festive grown up libation to make your party POP, how about these?

Pop Rocks rimmed cocktails...brought to you by Pizzazzerie. SUPER FUN!


I hope your 4th of July ROCKS! Happy Birthday America!

Friday, June 24, 2011

Summer Subway Art

Summer is in full swing so I felt the need to create some fun printable art. I love subway style art because it showcases one of my favorite things...words! 


Here are two I created that highlight my & my family's favorite things about summer. Download  a copy for yourself or learn how easy it is to create your own in my previous post here!


Beach Subway


Summer Subway

Happy Summer!

Thursday, June 23, 2011

{DIY} Magnetic Photo Collage

I love photo collages, but in all honesty, I'm too lazy to update them! The thought of taking down the frame, removing the back, removing the pictures, etc etc etc...well it just never gets done. So despite my love of taking pictures, I don't have any collages hanging around.

Recently I made a fabric magnetic board and it was so easy, that as soon as I finished it, I knew I was going to make more. I decided that it would also make a perfect way to display a photo collage. I can change the pictures with little effort which is right up my alley!

To make your own cute magnetic photo collage you will need:

-large magnetic board (I used an old calendar/dry erase board I had)
-fabric (mine used just about 3/4 yard)
-hot glue (but of course)
-ribbon & embellishments of your choosing
-buttons for magnets
-magnet backs 
-hook for hanging
-fun pictures to display

I started with a dry erase magnetic calendar I was no longer using. 


Then I cut my fabric so that there was enough material around the edges to allow me to glue it down. I would say about 4 inches or so.


I hot glued the fabric around the board.


If your fabric is light colored (like mine), keep in mind that your board may show through. This turned out to be the case with mine, but I didn't realize it until after I had glued it down and didn't feel like redoing it (yes...I like crafting the l-a-z-y way). I figure the pictures will cover it up, but if I were to do it over, I would have simply doubled up the fabric or painted over the darker parts of the board. 

Next up...decorating! I used some ribbon and chipboard letters to spell out "sisters" & "family". I glued everything in place (despite the letters claim to be "adhesive").  I had some cute flower buttons and glued those on for additional decoration...I really love buttons! On a side note: can you tell all the following pictures were taken outside??? What a difference...I should just do all my work in the yard!


Of course I needed magnets, so I glued on some magnetic backs to a few of the larger flower buttons.


I hot glued a picture hook onto the back and added a few cute pictures.


It is such a super easy project that can be tailored and personalized with unlimited possibilities! Betcha can't make just one ;)


I'm linking this post over at...


Nothing But Country

Somewhat Simple


Join  us Saturdays at tatertotsandjello.com for the weekend wrap 
 up           party!
The Girl Creative

Confessions of a Stay At Home Mommy

Sunday, June 19, 2011

Happy Father's Day

I hope all the awesome Dads out there enjoyed a fabulous Father's Day! My own Super Daddy husband  had fun being showered with love by his two beautiful little girls, which in addition to the many many many special drawings (they really love art) also included a cake.


We knew we were going to make him a cake, but I wasn't sure how to decorate it. My soon-to-be 5 year old always wants to help me decorate...and she is rarely allowed. Not because I'm some mean mommy, but because my cakes are typically for a celebration or for someone else. But I really wanted her to be able to help with a cake for Daddy this year. Then I saw this super fun Doodle Cake over at Sweetapolita and I knew it was perfect!


I think this concept is genius! A cake covered in white fondant and then decorated with edible markers. Can I tell you that my daughters had a blast decorating this cake??? It is the perfect way to let the kids put their personal touch on a cake with no limitations. Ok...I did have to stop my 2-year-old from stabbing the cake with her marker (you can see a couple of holes she made), but mostly they were free to do what they wished.


Inside the cake was a yellow cake with caramel filling and chocolate ganache frosting under the fondant (at my husband's request). It was as delicious as it was beautiful and Daddy loved his very special cake!


Happy Father's Day!

Sunday, June 12, 2011

Wonder Woman Cake

Being a child of the 70s, Wonder Woman was most definitely one of my childhood heroes. Between watching Lynda Carter  bring the goddess to life every week and watching the Super Friends every Saturday morning, I couldn't get enough of Wonder Woman! 


So when my Goddaughter chose Wonder Woman as her 5th birthday theme, I was thrilled. I wanted to make her a cake that pulled together the iconic elements of the character...the red, white & blue, the lasso of truth and of course, the tiara. She IS a princess after all!


The cake was delicious chocolate with cookies n' cream filling and yummy vanilla with strawberry cream filling. All decorations are handmade and completely edible (the birthday girl happily munched on the tiara).

Our little Wonder Woman was super thrilled with her cake! Now's she ready to go out and save the world!


Wednesday, June 8, 2011

{DIY} Super Hero Capes: The No Sew Way!

My super cute Goddaughter is having a Wonder Woman /Super Hero party to celebrate her 5th birthday. I was already on board to make the cake (but of course), and then volunteered to make Super Hero capes as well. I've seen these on so many party posts and knew the kids would just love them! Plus I thought making them would be a great way to help my sister-in-law save a little on the party budget.


I also saw this a great opportunity to motivate myself to learn to use my sewing machine, a task that has been on the "to do" list foreverBut since the title of this post includes the words "no sew", you can probably guess how that turned out!


As it turns out I am NOT a natural at sewing a straight line. So with a deadline looming over me, I decided to just make the whole project "No Sew". You can certainly use your sewing skills (and have my envy), but as long as you can wield an iron, you can make this!


I made 10 of these capes, so scale your supplies accordingly. Also, these are for a party of kids ranging from ages 2 to 5. My daughters and Goddaughter are tall for their age so these capes are on the longer side. If you have mostly toddlers you will probably want to make these shorter so they aren't tripping over them.


Supplies needed for 10 capes:
-5 yards of fabric (I used inexpensive & lightweight broadcloth). *1 yard of fabric will yield TWO capes.
-ribbon in coordinating colors (I used 3/8 " wide for trim & ties)
-rick rack (I ended up using 6 packages of the 2 1/2 yd size packs)
-"No Sew" adhesive tape (1 pkg was just enough...make sure it's not wider than your ribbon)
-"No Sew" adhesive sheets (1 pkg was just enough...use the kind designed for patches)
-fabric glue
-hot glue
-embellishments of your choosing (I used felt glitter stars)
-5 pieces of white felt *1 piece of felt will yield 2 emblems
-additional felt in coordinating colors for initials (I got appx 4 initials out of one piece)
-iron


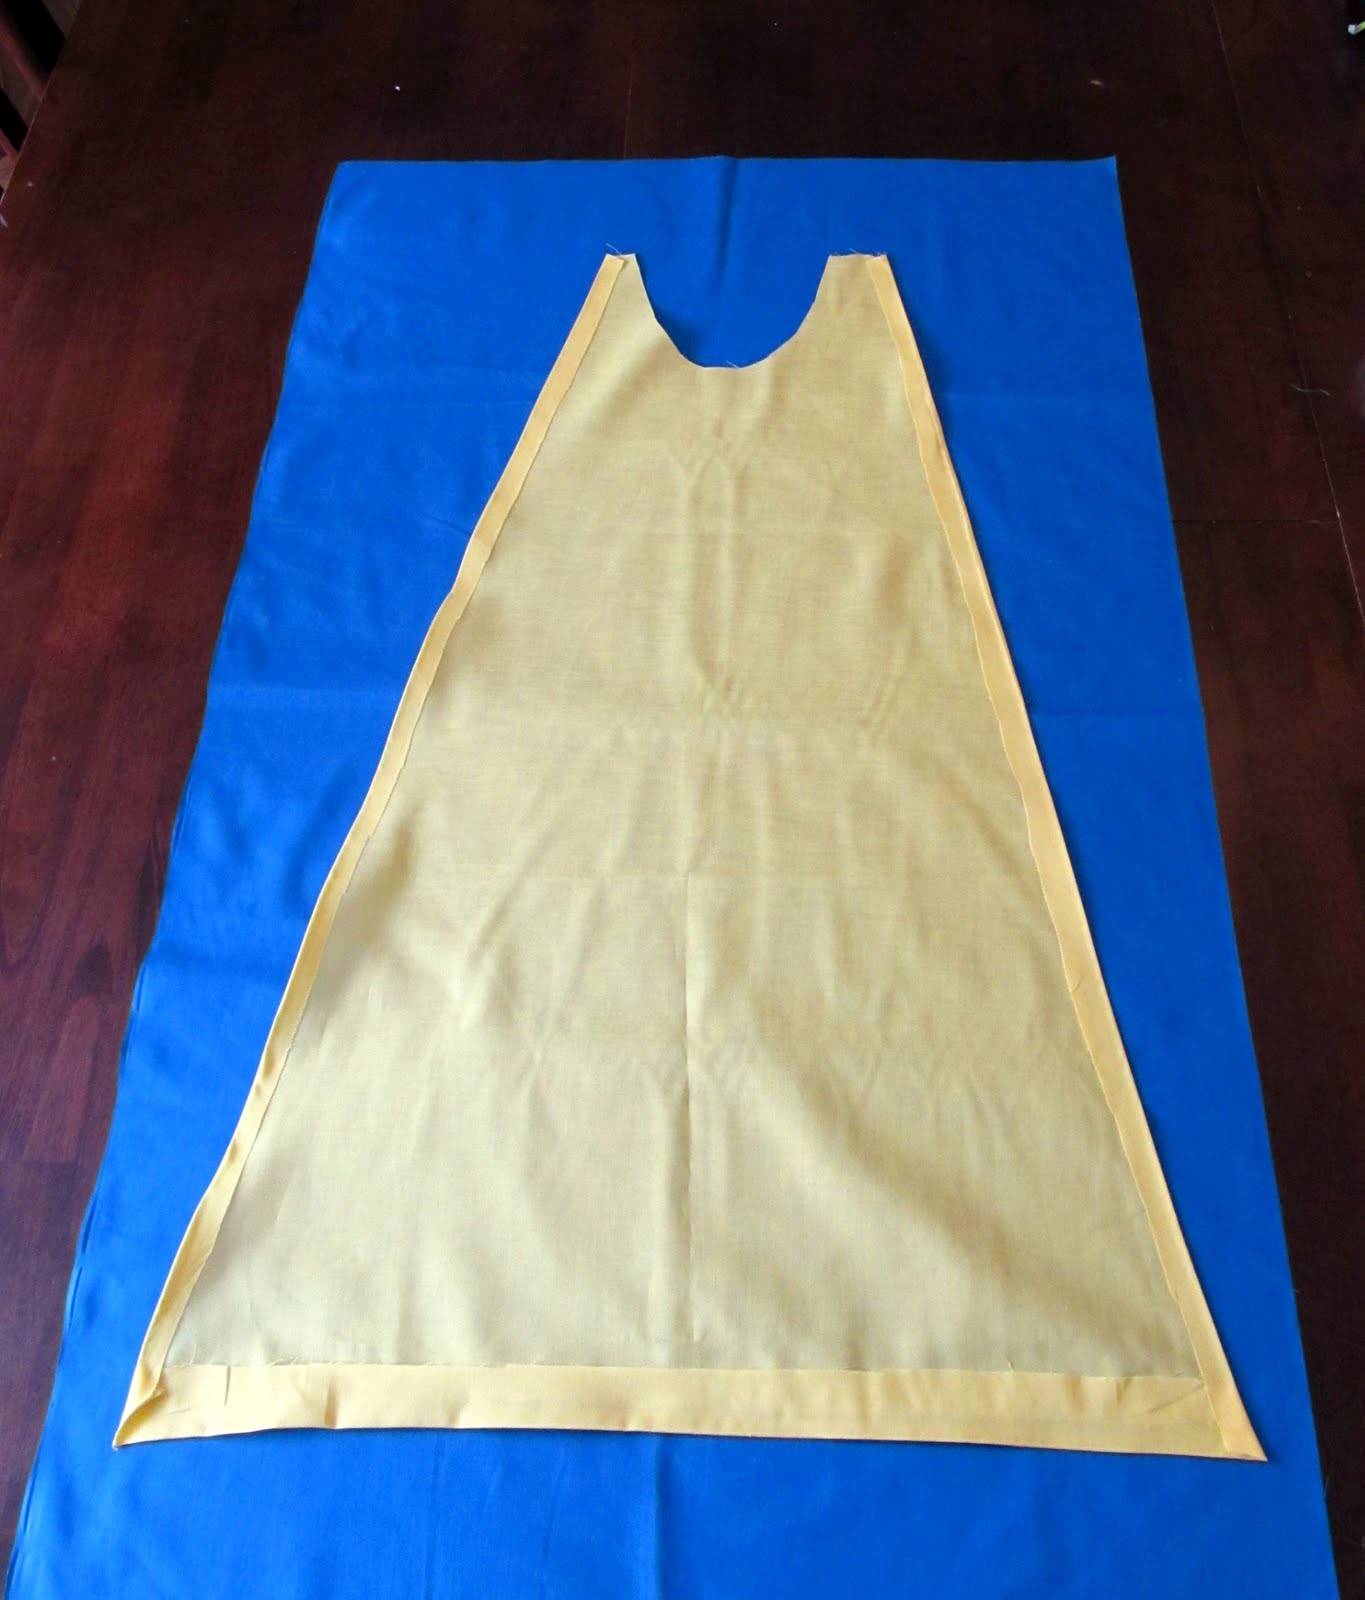
To begin, take each yard of fabric and cut it in half vertically (which luckily will probably be right along the fold already there). You can make 2 capes out of every 1 yard.


After cutting each yard in half, you need to determine how big you want your capes. I used my daughter as my model (who quickly grew tired of being measured and re-measured I might add). You could get fancy and make a template out of brown craft paper or something similar, but I just cut one cape out and used it as the stencil for all the remaining ones.


The measurements shown above are actually for the finished cape. I realized I had already hemmed them all with the tape and forgot to take a picture (sorry). So when measuring and cutting your cape, keep in mind that you will be folding the edges to create a hem, so your un-hemmed cape will actually be about a 1/2" wider and longer than shown above. But ultimately, you will make these in whatever size works for you!

Since I was making 10 of these babies, I found it easier to proceed in an assembly line fashion. In other words, I cut ALL the capes out first, then hemmed ALL the capes, etc etc etc. It made it much easier than trying to complete one cape at a time.

Next up...putting your iron to work! First, create a "hem" by folding over your fabric and ironing it to make a crease. You can skip this step, but I found it easier to line up the fabric tape with a guideline like the crease. Then you can cut your tape to the length you need and iron following your product instructions.


After ironing the fabric tape around all 3 edges (save the collar area for last), you are ready to start applying the trim.

I used fabric glue to attach all my trim. You could use fabric tape if you prefer, but it was more expensive than the glue, so I switched to glue for the more decorative parts of the project. You could also skip the fabric glue and use hot glue instead. I originally purchased fabric glue because I thought this could be laundered, but now I'm thinking these are more "spot clean" ;)

I used ribbon for the bottom edge and then white rick rack for the sides. I really like the contrast of the white and it reminded me of the failed stitching I had attempted :) The fabric glue directions stated that it needed to dry for 24 hours so I let my capes hang out overnight and they were ready to be finished the next morning.

Next, I added some embellishments to jazz it up and also to cover the corners where my ribbon and rick rack met.  I found some cute glitter felt stars that were perfect so I hot glued those on the bottom corners.


At this time I also decided to hot glue the raw edge of the neck/collar area of the fabric. I folded over the fabric a smidge (how's that for precise measuring) and hot glued it down for a more finished look. I then hot glued on more ribbon for the ties and then finished it off with some more glitter stars.


Of course the Super Hero capes would not be complete with the Super Heroes initials on them. So I made patches with each child's initial. 

I used white felt to cut out a "Super Hero-ish" shape. I kind of winged these, but I think you could use just about any shape you wanted. Then I cut each letter out of felt. I created a stencil by printing out letters in the font & size I wanted, which is a little trail & error. I hot glued the letters onto the patches.


Then following the package directions, I ironed on the patches with the fabric adhesive.


I found the felt to be pretty thick and the iron wasn't heating up the adhesive very well. So, I flipped it over, lined up the patch underneath and ironed on the reverse. Now if you do that, pay close attention or all that flipping might lead you to iron the patch completely on the wrong side. Say around cape #7 when you think you have your ironing groove on (might have happened to someone I know).

I can't wait to take these to the party this weekend and see all the little Super Heroes in action. Mine is already ready for action...


Super Heroes to the rescue!

I'm linking this post over at:


Nothing But Country


Tip Junkie handmade projects


lil luna link party button


Pure Joy Events button