Today I'm sharing a super easy and inexpensive party decoration that I made for my daughter's recent birthday party. It's a Photo Collage Banner that is perfect for any birthday party, no matter what the guest of honor's age!
What you will need for your banner:
- cardstock: 2 sheets plus additional for photos (1 sheet for every 2 photos)
- scrapbook paper: 2 sheets of 12x12
- small alphabet (or number) stickers
- 1 chipboard letter & 1 chipboard number (child's initial & age)
- coordinating ribbon
- mini clothespins (one for each photo)
- glue dots
- large bowl for tracing circles
- 2" circle punch (or small cup)
- scissors
- photos of your choosing (4x6)
To begin, cut your cardstock to approximately a 5x7 (one for each photo), so it's just a little larger than your 4x6 photo. Using the glue dots, mount pictures onto the cardstock.
Clip a mini clothespin to each photo and put them aside for now.
Using your large bowl as a template, trace two large circles out of the cardstock. My bowl & circles are 7 3/4" across.
Using your 2" circle punch (or a small cup as a template) cut out 2 small circles. I love to use every inch of my paper, so I just used my scraps.
Attach the chipboard letter and initial to each circle (you could use a large sticker instead).
Next it's time to make the rosettes. Besides my daughter's pictures, this is my favorite part! I just love how festive paper rosettes are.
Take a sheet of your scrapbook paper and fold it accordian-style.
Fold the paper in half and cut into two equal pieces.
Take each of those pieces and fold them in half.
You should now have two semi-circles.
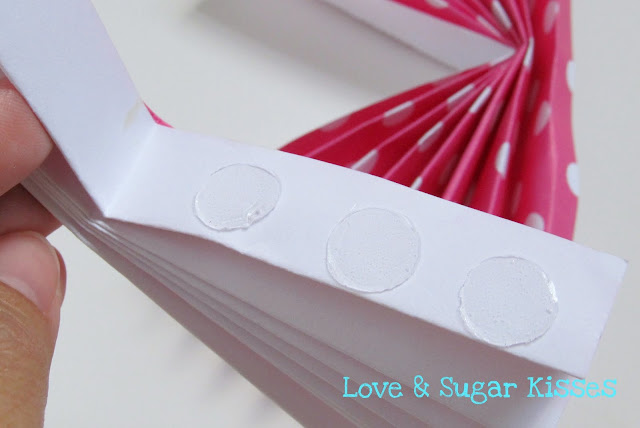
Using your glue dots, attach both halves together and use additional glue dots to seal up the center. You should now have one very pretty paper rosette! Repeat to create the rosette with the other piece of scrapbook paper.
Now it's time to put it together! Use your glue dots to attach the small circle onto the center of the rosette and then attach the rosette to the center of the larger circle. I seriously don't know what I did before glue dots!
Cut your ribbon long enough to hang all your photos, plus 4" on each side. It's helpful to lay out your ribbon and place your already mounted photos along it to make sure you have enough. Attach the extra 4" of ribbon to your large circle using...glue dots of course! You will be attaching it to the back side so make sure your ribbon pattern (if any) is facing correctly.
Now your fabulous party banner is ready to be hung! I used rolled up packing tape to mount it to my walls, but I know not everyone is comfortable with tape on their walls...LOL! So use whatever method you prefer to adhere the banner to wherever you want it displayed.
Once you have your banner hung, clip your photos on and your decoration is ready to party!
I hope you enjoyed this fun Photo Collage Banner tutorial and are inspired to make one for your own celebration!


Loved it... my son is also turning 5...
ReplyDeleteMarilia (Brazil)
I did something similar for my sons first bday! This year my little girl will be six... Can't wait to use this great idea! Thanks!!
ReplyDeleteI can't wait to use this idea with my daughters 6th birthday which, oddly enough, is also a puppy party :). Such an awesome idea. Thanks
ReplyDeleteAnd the same colors also!!
Delete